OpenVAS: Setting Up Your First Vulnerability Scan


Discover the power of OpenVAS, a free and open-source vulnerability scanner that helps you identify security weaknesses in your network and applications. This blog post provides a comprehensive guide to getting started with OpenVAS, from installation and configuration to running your first scan and interpreting the results

Scanning Your Home Lab with OpenVAS in Proxmox: A Step-by-Step Guide
Keeping your home lab secure is just as important as protecting any other network. Vulnerability scanning helps you identify potential weaknesses before they can be exploited. In this post, we'll walk through deploying OpenVAS in a Proxmox VM running Ubuntu, and then use it to scan a separate VM within your home lab environment.
Why OpenVAS?
OpenVAS (Open Vulnerability Assessment System) is a powerful, open-source vulnerability scanner that offers a comprehensive suite of tools for identifying security flaws. It's a fantastic free alternative to commercial solutions, making it perfect for home lab enthusiasts.
Prerequisites:
- A Proxmox VE server up and running.
- Basic familiarity with Proxmox and Linux command line.
- Two virtual machines: one for OpenVAS (Ubuntu recommended) and one target VM you want to scan (any OS). Ensure both VMs can communicate within your home lab network.
Step 1: Create the OpenVAS VM in Proxmox
- In the Proxmox web interface, create a new VM. Choose Ubuntu (or your preferred Linux distribution) as the operating system.
- Allocate sufficient resources (at least 2GB RAM and 20GB disk space is recommended).
- Configure the network settings, ensuring the VM is on the same network as your target VM.
- Start the VM and connect to it via SSH or the Proxmox console.
Step 2: Install OpenVAS on Ubuntu
- Update the package list:
Bash
sudo apt update- Install the required packages. This might take some time:
Bash
Bash

sudo apt install openvas- During the installation, you'll be prompted to configure the Greenbone Security Assistant (GSA). Follow the on-screen instructions. You'll need to set an administrator password.
- After installation, update the vulnerability feeds. This is crucial for ensuring OpenVAS has the latest vulnerability information:
Bash
sudo openvas-setupThis process downloads and compiles the vulnerability tests (NVTs) and can take a significant amount of time (sometimes several hours) depending on your internet connection and system resources. Be patient!
Step 3: Accessing Greenbone Security Assistant (GSA)
- Once the
openvas-setupis complete, you can access the GSA web interface. Find the IP address of your OpenVAS VM. - Open a web browser and navigate to
https://<OpenVAS_VM_IP>:9392. Replace<OpenVAS_VM_IP>with the actual IP address. - Log in using the administrator credentials you set during the installation.
Step 4: Configuring a Scan Target
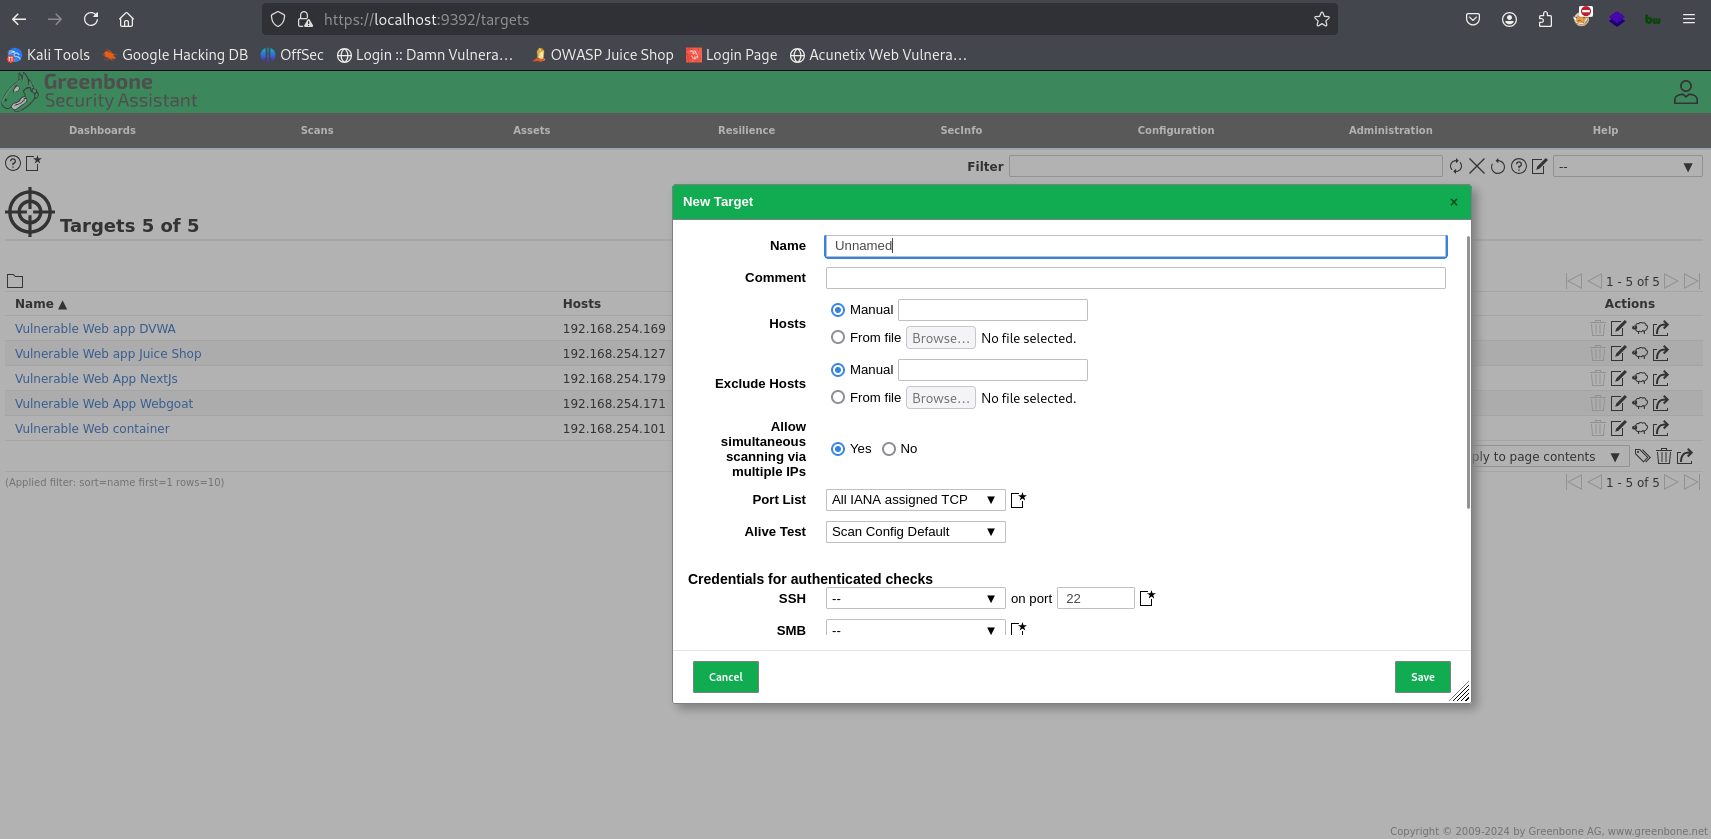
- In the GSA web interface, navigate to Configuration -> Targets.
- Click Create Target.
- Give your target a name (e.g., "My Home Lab VM").
- In the Hosts field, enter the IP address of the VM you want to scan.
- Save the target.
Step 5: Creating and Running a Scan
- Navigate to Scans -> Tasks.
- Click Create Task.
- Give your scan task a name (e.g., "Home Lab Scan").
- Select the target you created in the previous step.
- You can customize the scan settings (e.g., scan type, NVT selection) if desired. For a basic scan, the default settings are usually sufficient.
- Save the task and click the play button to start the scan.

Step 6: Analyzing the Scan Results
- The scan will take some time to complete, depending on the target and the scan settings.
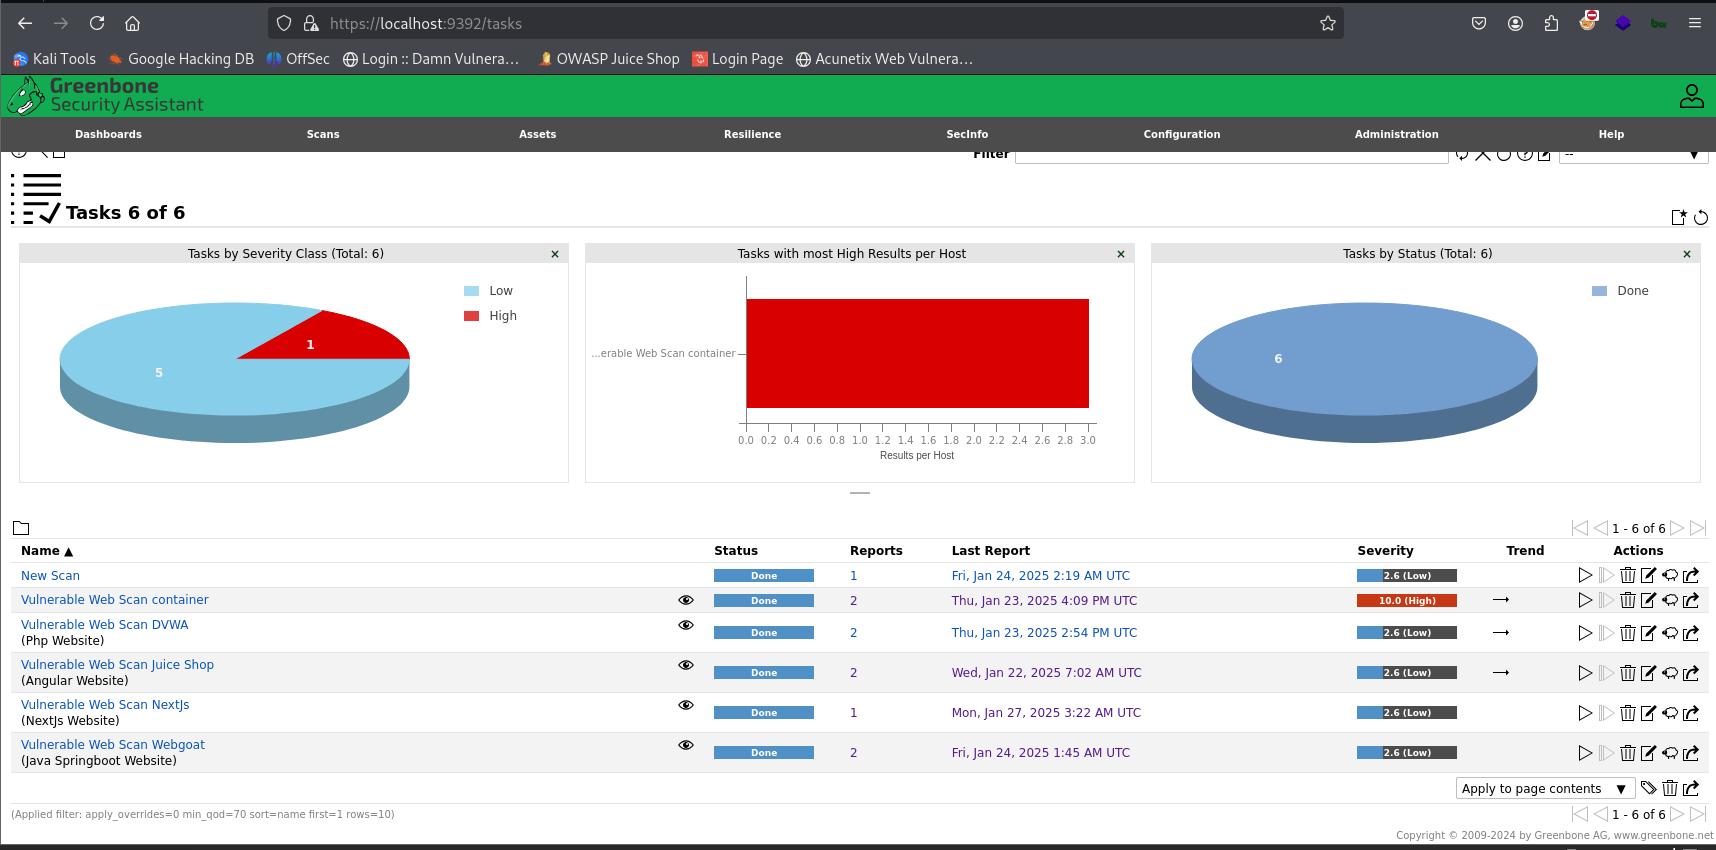
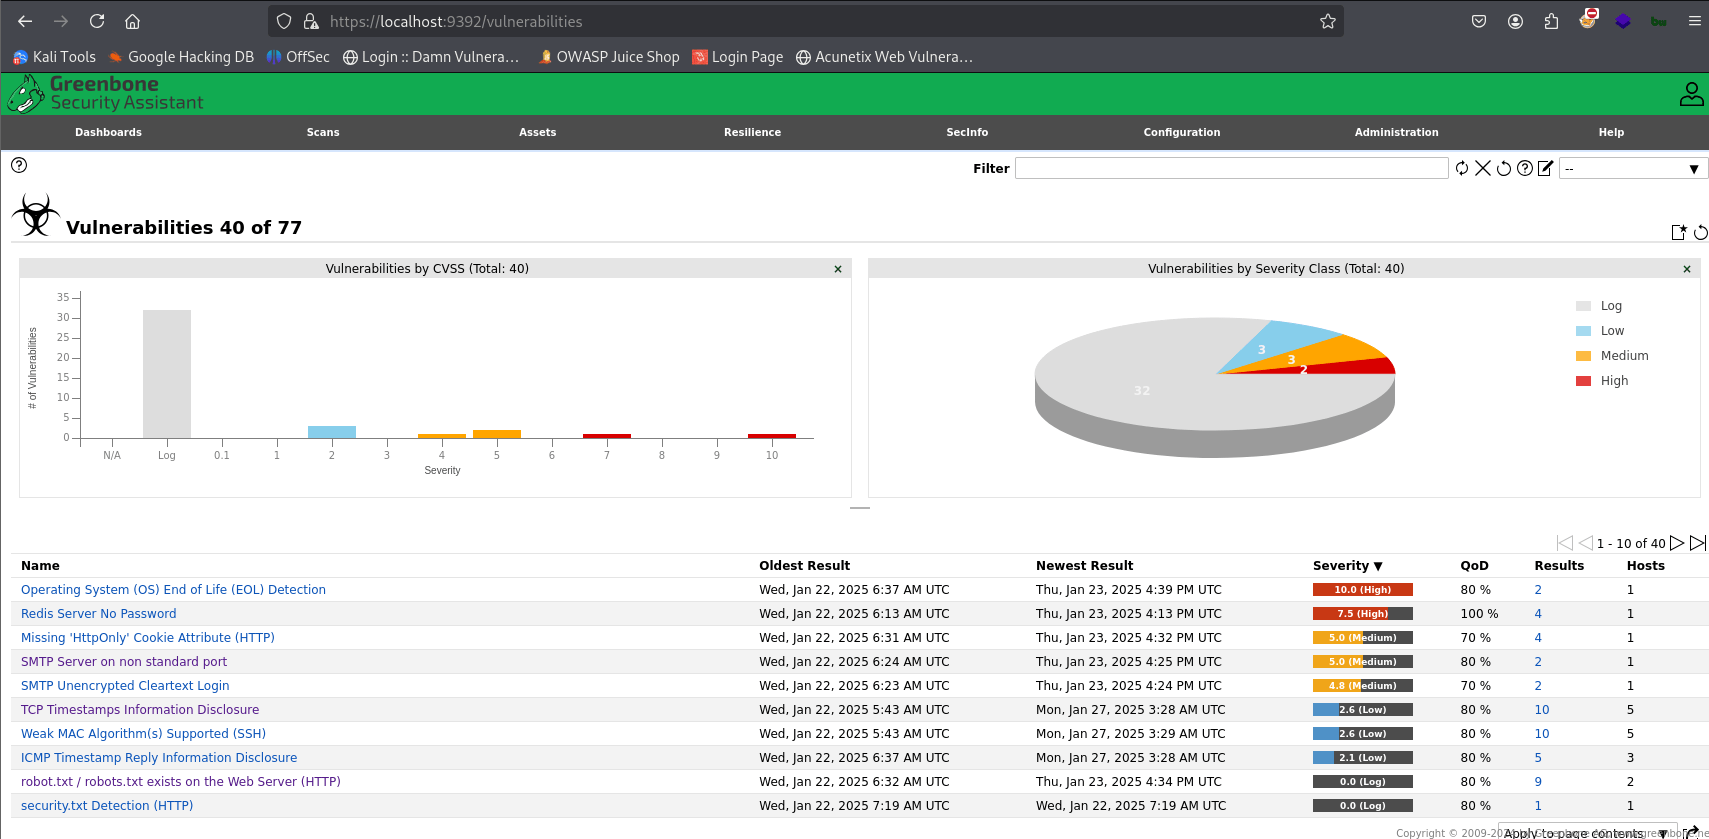
- Once the scan is finished, you can view the results in the GSA web interface.
- The results will show a list of identified vulnerabilities, their severity levels, and detailed descriptions.
- Carefully review the results and prioritize the vulnerabilities based on their severity and potential impact.
OpenVas - Scan - Vulnerabilities
OpenVas - Scan - Result

OpenVas - Scan - Specific Vuln - Details

Important Considerations:
TipFirewall: Ensure that your OpenVAS VM's firewall allows communication on the necessary ports (especially port 9392 for GSA).
CautionNVT Updates: Regularly update the NVT feed to ensure OpenVAS has the latest vulnerability information. You can do this using the
sudo openvas-nvt-synccommand.
CautionScan Time: Vulnerability scans can take a considerable amount of time. Be patient and plan your scans accordingly.
CautionResource Usage: OpenVAS can be resource-intensive. Monitor your VM's CPU and memory usage during scans.
CautionEthical Scanning: Only scan systems that you have explicit permission to scan. Unauthorized scanning is illegal and unethical.
Conclusion
By following these steps, you can effectively use OpenVAS within your Proxmox environment to identify and address security vulnerabilities in your home lab. Remember to keep your OpenVAS installation updated and scan your systems regularly to maintain a strong security posture.