Deploying a Next.js App to GCP Cloud Run Using GitHub and Dockerfile
Deploy a Next.js app to Google Cloud Run with Docker, using Google Cloud Build for CI/CD. This setup enables auto-scaling and seamless GitHub updates.

Introduction
This guide covers deploying a Next.js application to Google Cloud Run using Docker and automating updates with Google Cloud Build for CI/CD. By containerizing Next.js and leveraging Cloud Run's serverless hosting, you’ll achieve automatic scaling, simplified deployment, and seamless updates from GitHub pushes.
Step 1: Set Up Google Cloud Project
- Create a New Google Cloud Project
Go to the Google Cloud Console and create a new project. - Enable Required APIs
In your project, enable:- Cloud Run API
- Cloud Build API
- Container Registry API
Step 2: Prepare the Next.js Application for Deployment
- Create a Dockerfile
In your Next.js project’s root directory, create aDockerfile. Here’s a sample for Next.js:
Dockerfile
# Step 1: Base Image
FROM node:23.0.0-alpine3.20 AS base

# Install compatibility package
RUN apk add --no-cache libc6-compat

# Set working directory
WORKDIR /app

# Step 2: Dependencies Layer
FROM base AS deps

COPY package*.json ./

# Install dependencies
RUN npm ci

# Step 3: Build Layer
FROM base AS builder

WORKDIR /app

# Copy dependencies from previous layer
COPY --from=deps /app/node_modules ./node_modules

# Copy the rest of the app files
COPY . .

# Disable Next.js telemetry
ENV NEXT_TELEMETRY_DISABLED 1

# Build the Next.js application
RUN npm run build

# Step 4: Runner Layer
FROM base AS runner

WORKDIR /app

# Set environment to production
ENV NODE_ENV production
ENV NEXT_TELEMETRY_DISABLED 1
ENV PORT 3000  # Use port 3000 as per your Cloud Run setup

# Create non-root user and group
RUN addgroup --system --gid 1001 nodejs \
    && adduser --system --uid 1001 nextjs

# Copy necessary files for runtime
COPY --from=builder /app/public ./public
COPY --from=builder --chown=nextjs:nodejs /app/.next ./.next
COPY --from=builder /app/node_modules ./node_modules
COPY --from=builder /app/package.json ./package.json

# Switch to non-root user
USER nextjs

# Expose port 3000
EXPOSE 3000

# Start the application
CMD ["npm", "start"]- Test Docker Image Locally (Optional)
You can test the Docker image locally by building and running it: - bashCopy codedocker build -t nextjs-app .
docker run -p 3000:3000 nextjs-app
Step 3: Deploy to Google Cloud Run
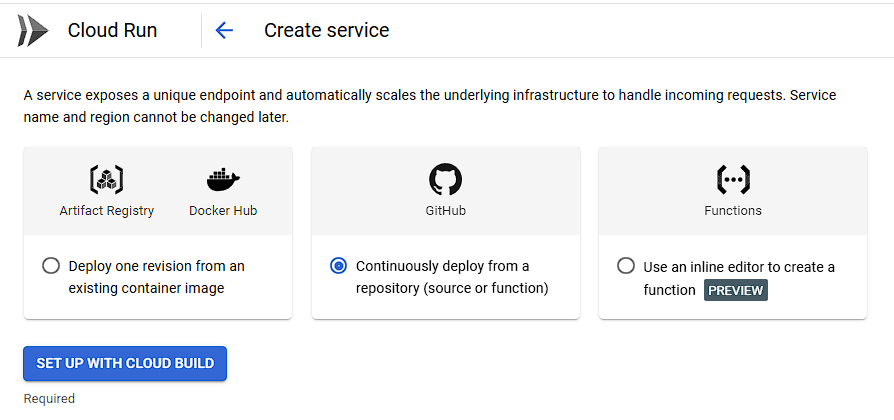
- Deploy from Google Cloud Console
- Go to the Cloud Run console and click on Create Service.
- Choose your project and select Deploy container image.
- Select the image from Container Registry (
gcr.io/[YOUR_PROJECT_ID]/nextjs-app). - Set the Region to your preferred location.
- Configure Service Settings
- Port: Set the port to
3000to match your Next.js setup. - Auto-scaling: Enable it and set the maximum instances as needed.
- Allow Unauthenticated Access: If you want the app to be publicly accessible, make sure to allow unauthenticated access.
- Port: Set the port to
- Deploy the Service
Click Create to deploy your Next.js application to Cloud Run. Once it’s deployed, you’ll get a public URL to access the app.
Step 5: Set Up CI/CD with Google Cloud Build
- Create a OR edit
yamlFile in Your Repository
Add the followingyamlto automate the build and deployment to Cloud Run:
YAML
apiVersion: serving.knative.dev/v1
kind: Service
metadata:
  name: my-service
  namespace: 'MY_PROJECT_NAMESPACE'
  selfLink: /apis/serving.knative.dev/v1/namespaces/MY_PROJECT_NAMESPACE/services/my-service
  uid: unique-id-placeholder
  resourceVersion: version-placeholder
  generation: 1
  creationTimestamp: '2024-11-12T00:00:00.000000Z'
  labels:
    commit-sha: placeholder-sha
    gcb-build-id: build-id-placeholder
    gcb-trigger-id: trigger-id-placeholder
    gcb-trigger-region: global
    managed-by: cloud-build-deploy-cloud-run
    cloud.googleapis.com/location: us-central1
  annotations:
    serving.knative.dev/creator: user@example.com
    serving.knative.dev/lastModifier: project-id-compute@developer.gserviceaccount.com
    run.googleapis.com/client-name: gcloud
    run.googleapis.com/client-version: placeholder-version
    run.googleapis.com/operation-id: operation-id-placeholder
    run.googleapis.com/ingress: all
    run.googleapis.com/ingress-status: all
    run.googleapis.com/urls: >-
      ["https://my-service-MY_PROJECT_NAMESPACE.us-central1.run.app","https://my-service-unique-id-placeholder.a.run.app"]
spec:
  template:
    metadata:
      labels:
        client.knative.dev/nonce: nonce-placeholder
        commit-sha: placeholder-sha
        gcb-build-id: build-id-placeholder
        gcb-trigger-id: trigger-id-placeholder
        gcb-trigger-region: global
        managed-by: cloud-build-deploy-cloud-run
        run.googleapis.com/startupProbeType: Default
      annotations:
        autoscaling.knative.dev/maxScale: '10'
        run.googleapis.com/client-name: gcloud
        run.googleapis.com/client-version: placeholder-version
        run.googleapis.com/startup-cpu-boost: 'true'
    spec:
      containerConcurrency: 80
      timeoutSeconds: 300
      serviceAccountName: project-id-compute@developer.gserviceaccount.com
      containers:
      - name: main-container
        image: >-
          us-central1-docker.pkg.dev/my-project/cloud-run-source-deploy/my-service/image:placeholder-sha
        ports:
        - name: http1
          containerPort: 3000
        env:
        - name: NEXT_PUBLIC_SANITY_PROJECT_ID
          value: my-sanity-project
        - name: NEXT_PUBLIC_SANITY_DATASET
          value: production
        - name: RESEND_API_KEY
          value: placeholder-key
        resources:
          limits:
            cpu: 1000m
            memory: 512Mi
        startupProbe:
          timeoutSeconds: 240
          periodSeconds: 240
          failureThreshold: 1
          tcpSocket:
            port: 3000
  traffic:
  - percent: 100
    latestRevision: true
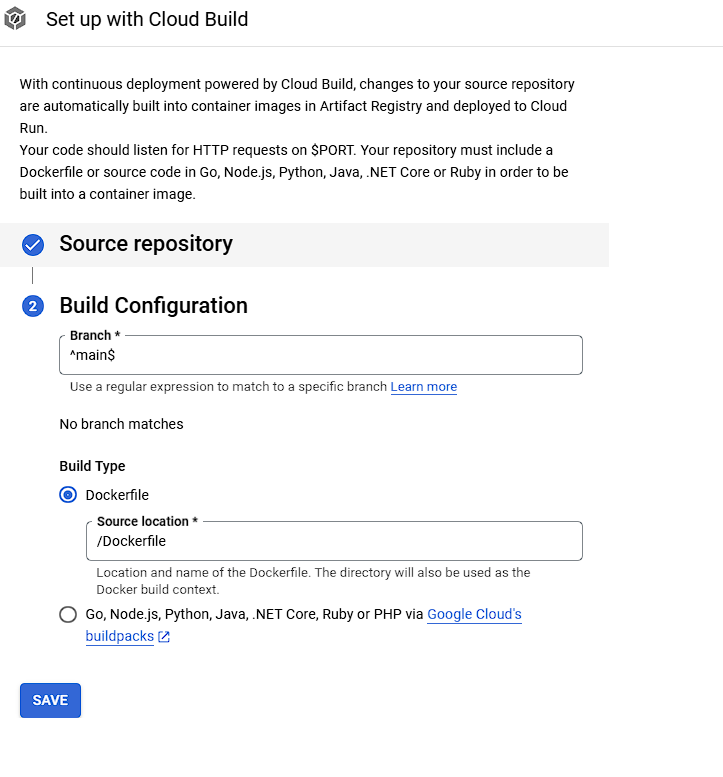
- Create a Build Trigger in Cloud Console
- Go to Cloud Build > Triggers in the Cloud Console.
- Set up a new trigger and connect it to your GitHub repository.
- Select cloudbuild.yaml as the build configuration.
- Choose a branch (like
main) to trigger the build on each push.
Step 6: Verify and Test Your Deployment
Push Changes to GitHub
Commit and push any new changes to the repository. This will trigger the CI/CD pipeline in Cloud Build.
Monitor Deployment in Cloud Console
Check the Cloud Build > History section to view the progress of your build. Once it completes, the updated application will be live on Cloud Run.
Summary
This configuration allows you to deploy a Next.js app on Google Cloud Run, automatically scaling based on demand, with CI/CD to automate future deployments. Your application will be served on port 3000, and changes pushed to the GitHub repository will trigger automatic updates.