Using GCP Compute Engine Free Tier

This project demonstrates how to set up and manage a virtual machine instance and utilize GCP’s free-tier offerings to build a scalable, cost-effective deployment.
Overview
Google Cloud Platform (GCP) offers a Free Tier option for its Compute Engine service, allowing users to create and run virtual machines (VMs) at no cost, within specific limitations. The Free Tier is ideal for learning, testing, and small workloads without incurring charges, making it accessible to those new to cloud services.
2. Why Choose GCP Compute Engine?
GCP Compute Engine offers several advantages, including:
- Reliability: Google’s infrastructure is known for its robust performance and high uptime, which is essential for any production-level workload.
- Scalability: With GCP, users can easily scale resources to accommodate growing requirements.
- Cost-Effectiveness: The GCP Free Tier allows users to explore and test out the platform at no initial cost.
- Customization Options: GCP offers a wide range of machine types, storage, and networking options.
- Global Reach: GCP’s global data centers help minimize latency by choosing regions closer to end-users.
Prerequisites
Before you begin, make sure you have the following:
- Google Cloud Account: You’ll need a GCP account with billing enabled. New users may be eligible for $300 in free credits in addition to the Free Tier.
- Internet Access: To access the GCP Console and set up resources.
Step-by-Step Process to Set Up GCP Compute Engine Free Tier
Step 1: Create a Google Cloud Platform Account
- Go to the Google Cloud Platform website.
- Click on Get Started for Free.
- Sign in with your Google account or create a new one.
- Set up billing information (required to enable the free tier).
Note: Google will not charge your account unless you exceed the Free Tier limits. Additionally, you may receive $300 in credits to use within the first 90 days.
Step 2: Access the GCP Console
1. Once logged in, go to the GCP Console.
2. Explore the dashboard to get familiar with the interface.
Step 3: Set Up a Project
1. In the GCP Console, click on the project drop-down list at the top of the page.
2. Select New Project.
3. Enter a project name and click Create.
Note: Each project has its own settings, billing, and resources.
Step 4: Enable Compute Engine API
1. Go to the APIs & Services section in the console.
2. Search for Compute Engine API.
3. Enable the API to allow virtual machine usage.
Step 5: Set Up a Virtual Machine on the Free Tier
1. Go to the Compute Engine section in the GCP Console.
2. Select VM instances and click Create Instance.
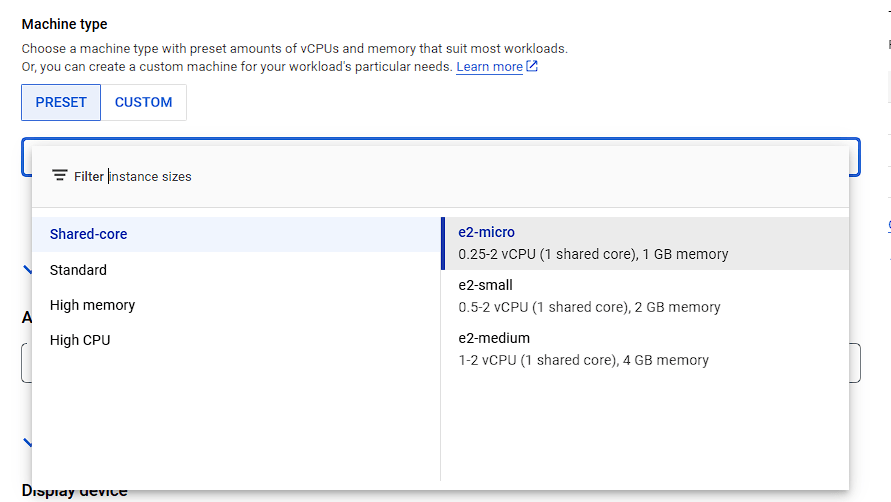
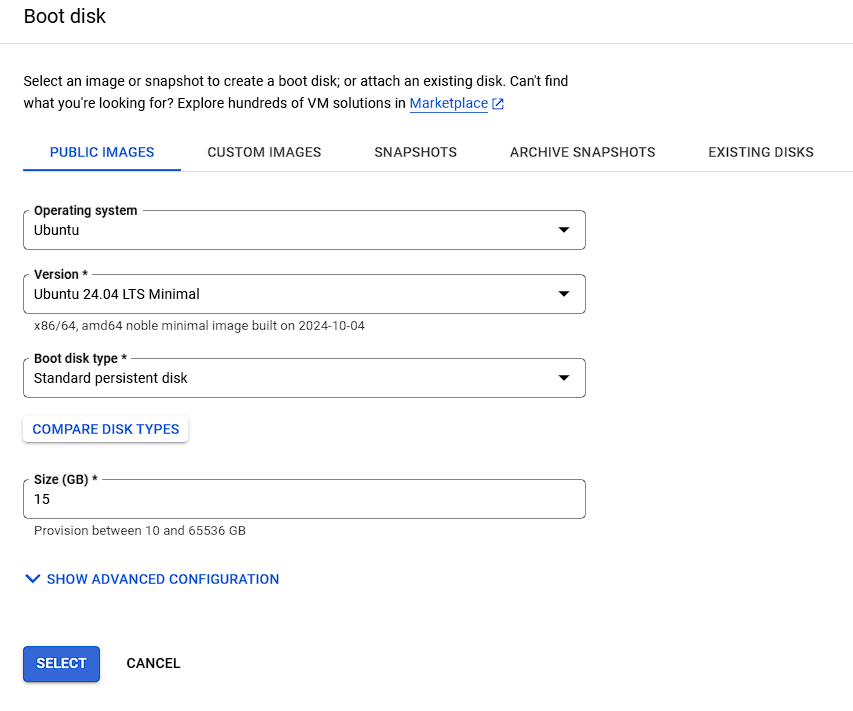
3. Configure the instance as follows to stay within the Free Tier limits:
- Region: Select a supported free-tier region (e.g.,
us-west1,us-central1). - Machine Type: Choose e2-micro (1 vCPU, 0.6 GB memory).
- Operating System: Select a free OS, such as Debian, Ubuntu, or other Linux distributions.
4. Leave other options as default or customize them based on requirements.
5. Click Create to start the VM.
Note: Be mindful of the Free Tier limitations, such as a 30GB HDD or 5GB snapshot limit, and 1GB network egress per month in North America.
Step 6: Access and Manage Your VM
1. Once the VM is running, you can connect to it by clicking SSH next to the instance in the VM instances page.
2. From the SSH terminal, you can configure the VM as needed, install software, and run commands.
3. When finished, consider stopping the instance to avoid using up free-tier limits unnecessarily.

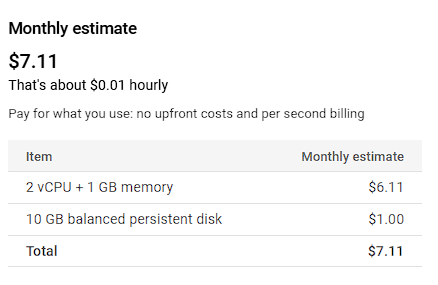
Step 7: Monitor Usage and Stay Within Free Tier Limits
1. Go to Billing > Reports to track your usage and ensure you remain within Free Tier limits.
2. Set up alerts if desired, to notify you of any potential overages.
5. Additional Tips and Considerations
TipUse Auto-Shutdown: Configure auto-shutdown if you don’t need the VM running continuously.
TipFree Tier Limits: Be aware of the monthly limits. Exceeding these will incur charges.
TipData Backup: Regularly back up important data as snapshots (limited to 5GB for Free Tier).
CautionBilling Alerts: If you see unexpected billing charges, review your usage and consult GCP’s Billing page.
Connectivity Issues: Check the VM's firewall settings under VPC network > Firewall rules to ensure your connections are allowed.
Exceeded Free Tier Limits: Consider upgrading or adjusting the resources to reduce costs.


