Hyper-V Setup Guide: Unleash Virtual Power
Discover the ease of Hyper-V setup with our guide. From enabling features to creating your first virtual machine, optimize resource usage, and explore virtual networking. Your gateway to a seamless virtualization experience

Introduction
In the realm of virtualization, Microsoft's Hyper-V stands tall as a robust and feature-rich hypervisor, empowering users to create and manage virtual machines (VMs) efficiently. Whether you're an IT professional, a system administrator, or an enthusiast, this blog post will guide you through the essential steps of setting up Hyper-V and explore its myriad of functionalities.
Chapter 1: Understanding Hyper-V
Before diving into the setup process, let's take a moment to understand what Hyper-V is and why it's a game-changer in the world of virtualization. Hyper-V is a hypervisor-based virtualization platform that allows you to run multiple operating systems on a single physical server, enabling efficient resource utilization and flexibility in managing workloads.
Chapter 2: System Requirements
Before you embark on the Hyper-V journey, ensure that your system meets the necessary requirements. Hyper-V is a Windows feature, and to use it, you need a Windows Pro, Enterprise, or Education edition. Additionally, your CPU must support virtualization technology (Intel VT-x or AMD-V) and should be enabled in the BIOS.
Chapter 3: Enabling Hyper-V Feature
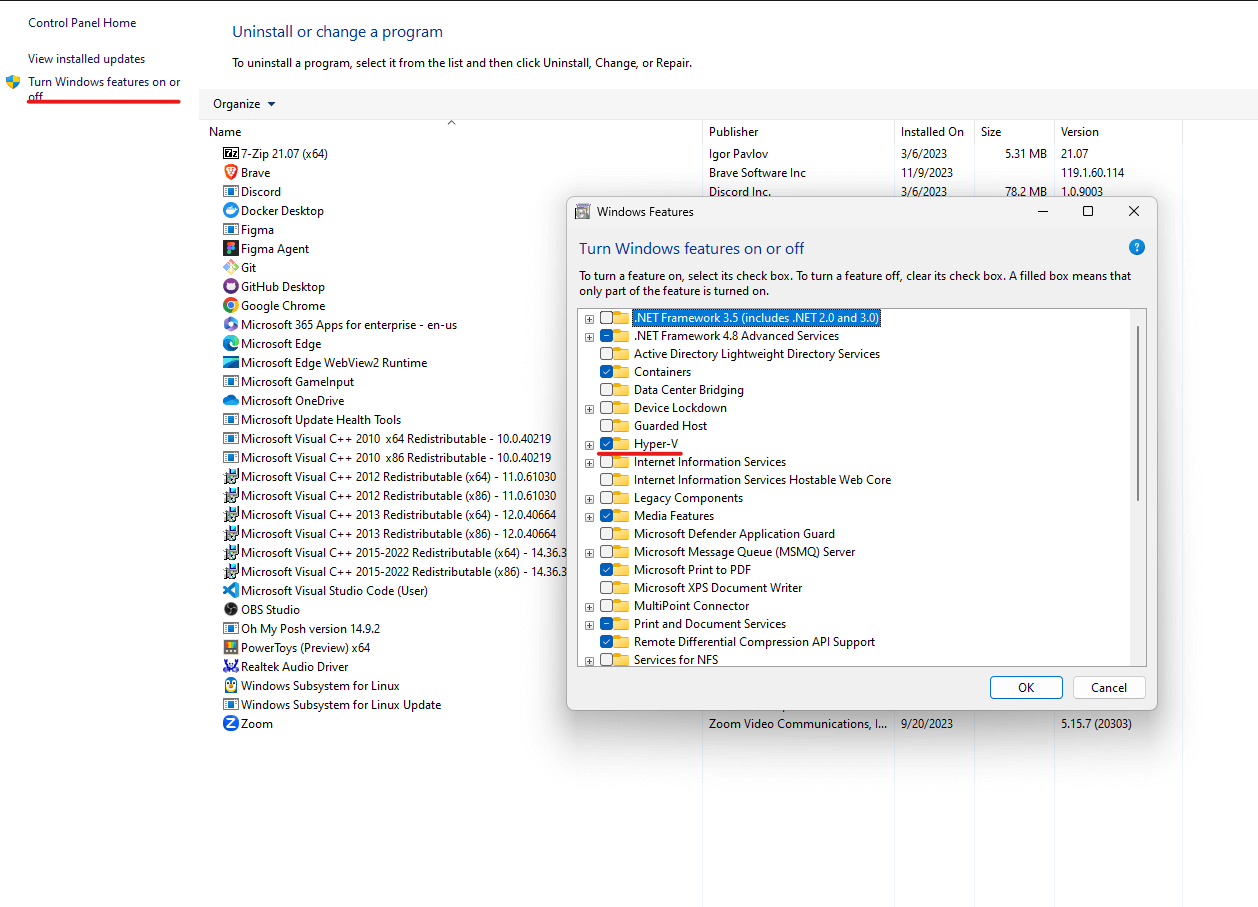
Setting up Hyper-V is a breeze. Follow these steps to enable the Hyper-V feature on your Windows machine
- Open the Control Panel.
- Go to "Programs" and then "Turn Windows features on or off."
- Check the box next to "Hyper-V" and click "OK."
Once the feature is enabled, you might need to restart your system.
Chapter 4: Hyper-V Manager
After the restart, launch the Hyper-V Manager, the central hub for managing your virtualized infrastructure. Here, you can create, configure, and monitor virtual machines, ensuring a seamless virtualization experience.
Chapter 5: Creating Your First Virtual Machine
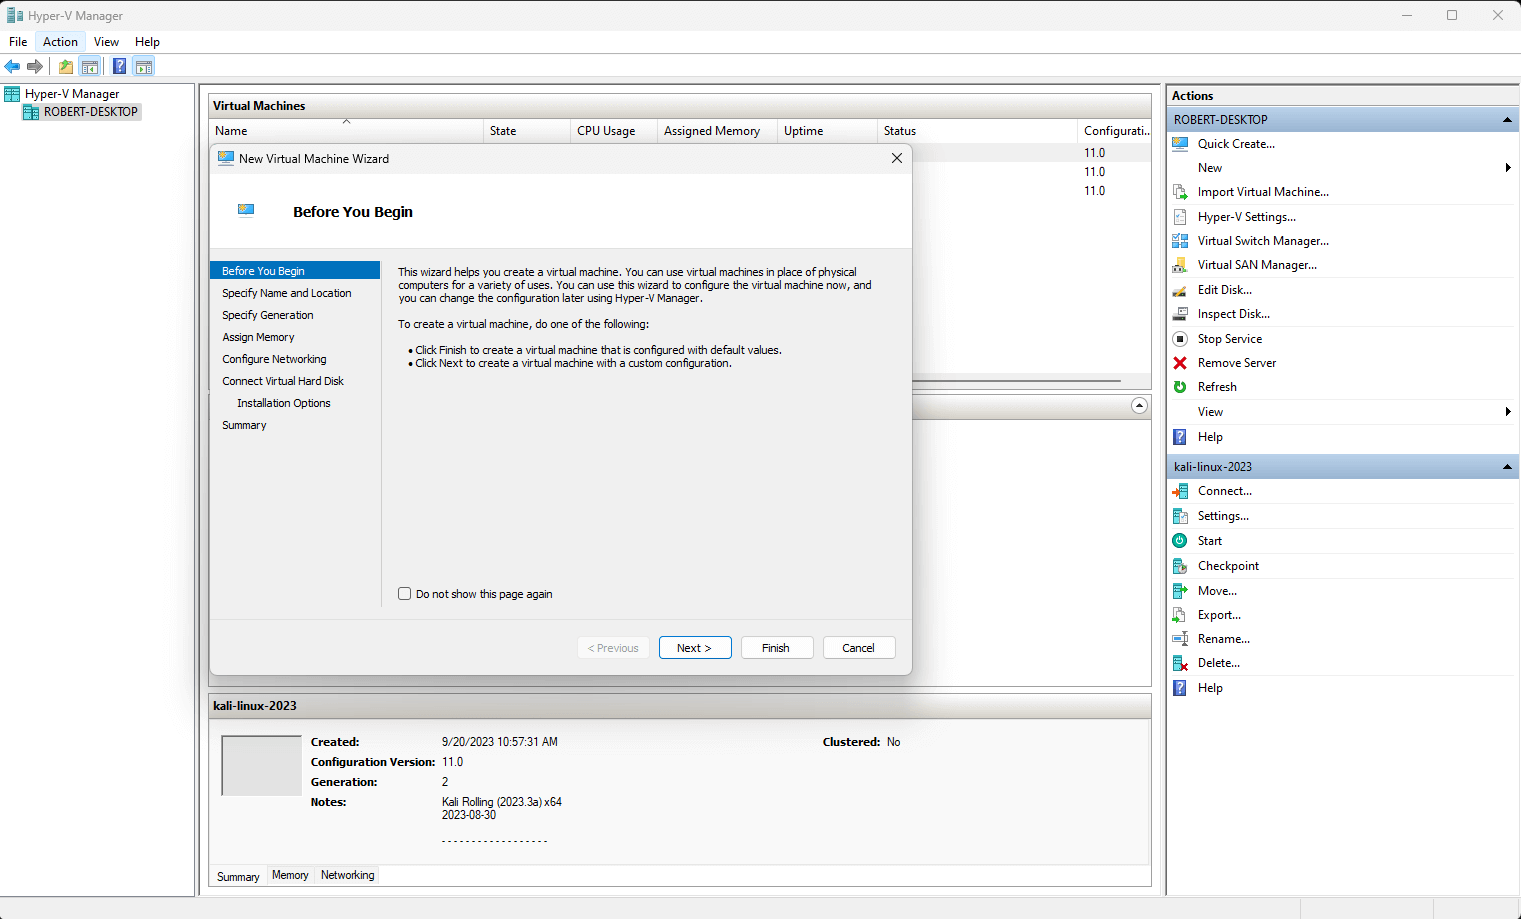
Now, let's get hands-on and create your first virtual machine
- Open Hyper-V Manager.
- Click on "Action" in the menu and select "New" and then "Virtual Machine."
- The Virtual Machine Wizard will guide you through the setup process, including specifying the VM name, assigning memory, configuring network settings, and installing the operating system.
Virtual Switches: Understanding virtual networking is crucial for a well-functioning virtual environment. Hyper-V enables you to create virtual switches to connect VMs and the host system to the network. Choose between External, Internal, and Private switches based on your networking needs.
TipDynamic Memory Allocation: Optimize resource utilization with Dynamic Memory Allocation. This feature allows Hyper-V to adjust the amount of memory assigned to a VM based on its workload, ensuring efficient utilization without compromising performance
CautionDisclaimer: The information provided in this blog post is intended for educational and informational purposes only. While every effort has been made to ensure the accuracy of the content, readers are encouraged to refer to official Microsoft documentation and seek professional advice for specific virtualization setups and configurations.
Official Documentation Links:
Conclusion
With Hyper-V, you've entered a realm of virtual possibilities. From efficient resource utilization to seamless VM management, this hypervisor offers a robust platform for all your virtualization needs. As you explore its functionalities, remember to stay updated on the latest features and best practices, ensuring a smooth and optimized virtualization experience. Happy virtualizing!